

How to Capture Steam on Warm Custard Desserts with Backlight
Steam is the hardest thing to photograph on a warm custard dessert, and the easiest thing to lose. A crème brûlée comes out of the oven glossy and fragrant, you set it down, and by the time the camera is focused the drama has already left the ramekin. The fix is not more heat. It is a different angle of light.
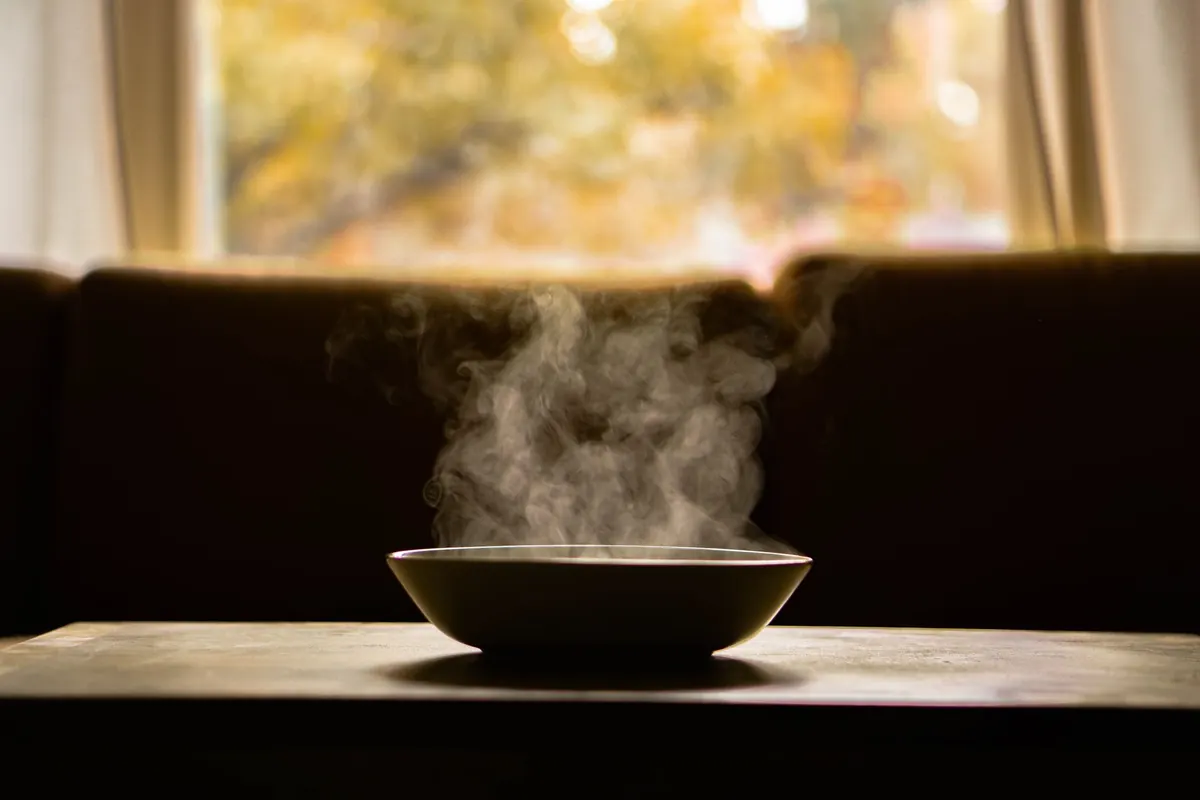
Front light flattens steam into nothing — the droplets scatter light back toward the dessert and your lens never sees it. Put the light behind the custard instead, aimed toward the camera, and every wisp becomes a bright ribbon against a dark background. What follows is the setup, the timing, and the small styling choices that separate a photograph that feels warm from one that just looks brown.
Why Backlight Reveals Steam
Steam is water vapor that has cooled just enough to condense into microscopic droplets. Those droplets scatter light in every direction, including straight toward your lens. When the light source sits behind the dessert and the background behind that is dark, the scattered light is the brightest thing in the frame, so the eye reads it as a column of steam.
Two conditions have to be true at once: the light must be behind the steam from your camera's position, and the background must be far darker than the steam. Break either one and you get nothing. A bright window behind a bright plate gives you a flat gray haze at best.
Build a Dark, Matte Background First
Contrast is the whole trick, so start by deciding what the steam will be seen against. Matte surfaces absorb light and disappear; glossy ones fight you.
- Good options: dark slate, charcoal linen, black velvet, scorched oak, unglazed dark stoneware.
- Avoid: glossy black acrylic, which mirrors your light source and your own reflection, and pale marble, which bounces spill everywhere.
- Always: a black foam board propped vertically behind the dessert, angled slightly away from the light.
Push that backdrop back. Light falls off with distance, so a surface a meter or two behind the custard receives a fraction of the light hitting the ramekin. If your background sits only a few centimeters behind the dessert, it will catch spill and turn mid-gray, killing the contrast you just built.
Position the Light: Low, Behind, Slightly Off-Axis
Place a small light behind the dessert, close to table height, and roughly 30 to 45 degrees to one side of the camera's axis. The low angle rakes across the top of the custard instead of pouring down onto the table. The offset keeps a sliver of the ramekin's rim lit, so the dessert still has an edge and a shape rather than becoming a silhouette.
Small and bare beats big and soft
A small source — a bare speedlight, or a COB LED fitted with a fresnel spot — produces defined ribbons of steam with visible edges. A large softbox wraps light around the droplets and they dissolve into a general glow. Start with the smallest modifier you own, and only soften things up if the highlights on the custard look harsh.
Keep the light out of the lens
Flag it. A black card clamped between the light and the lens, or simply a lens hood, stops flare from washing out the contrast you worked for. If the source is visible in your frame, move it further out to the side rather than cropping it out of a wider shot — partial flare looks worse than none.
Add a whisper of front fill
Pure backlight often leaves the custard itself too dark to read. Bounce a little light back with a white card on the camera side, or use a second flash at a fraction of the power through a diffuser. Keep it faint. You want the caramelized surface visible, not lit.
Work Fast: A Timed Shooting Routine
Steam lasts seconds, so anything that can be prepared in advance should be.
- Compose, focus, and test-fire the entire setup with a cold stand-in ramekin.
- Cool the room and shut off fans, air conditioning, and open windows. Still air holds a steam column together; a draft shears it sideways.
- Heat the custard properly. A portion straight from a water bath or a low oven produces far more visible steam than a lukewarm one.
- Torch the sugar crust or dust the surface right before the shot. Cracks in a brûlée crust let steam escape in a concentrated plume.
- Set the plate down, take one breath, and shoot a burst. The first twenty to sixty seconds give the strongest column; after that you are photographing the memory of heat.
- If it fails, plate a fresh portion and try again rather than waiting for a second chance that will not come.
Camera Settings for a Visible Column
Shutter speed matters more than anything else here. Steam drifts slowly, but a slow shutter smears it into fog. Somewhere between 1/160 and 1/320 of a second keeps ribbons crisp. With flash, the flash duration itself freezes the motion as long as you stay under your sync speed.
Work in manual mode at a low ISO, then set aperture for the depth you want. Around f/4 to f/5.6 usually keeps enough of the column sharp without dragging the backdrop into focus. Wider apertures give you a dreamier plume with only a slice of it defined, which is a legitimate look — just choose it on purpose.
Focus manually. Backlit steam confuses autofocus, and hunting costs you the shot. Zoom in on live view and focus on the front rim of the custard, right where the steam begins. A continuous LED makes this much easier because you can see the plume in real time; strobes give you more power but leave you guessing. A tripod keeps composition consistent across a burst, though plenty of shooters hand-hold the final frames as the plate lands.
Styling Choices That Make Custard Steam
Some custards steam better than others for purely physical reasons. Surface area, temperature, and moisture all matter.
- Shallow and wide. A shallow ramekin or open dish releases more steam than a deep, narrow one.
- Hot garnish. A spoonful of warm caramel, a drizzle of hot sauce, or a heated spoon resting against the rim adds a second plume and a second point of interest.
- A dusting that catches light. Cinnamon or cocoa powder in the path of the backlight shows the air moving and reads as warmth rather than smoke.
- Skip cold, damp garnishes. Berries and mint straight from the fridge cool the surface and add their own moisture, which muddies the plume. Add them after the steam frame, or warm them briefly.
- Warm the plate. A hot plate keeps the custard hot for an extra beat, and that beat is exactly the one you need.
If the steam will not show
Most of the time the light is too soft, the backdrop is too bright, or the room is too warm and too breezy. Check those three first. If the steam reads as one white blob, move the light further to the side and pull it back a little. If the whole frame is too dark, add a touch more front fill rather than raising the backlight. If the column bends sideways, you have a draft, not a lighting problem.
Rehearse the Setup, Then Trust It
Do a full dry run with a cold ramekin: position the background, place the light low and off-axis, flag the lens, focus manually, and check the frame. Then swap in the hot custard and shoot inside the first minute. Keep the room cool, keep the air still, and keep the light behind the dessert. Repeat the same setup until the timing is muscle memory, because steam does not wait for a second take.
Photo: Calvin / Pexels