

How to Photograph Crème Brûlée: Lighting the Cracked Caramel and Silky Custard
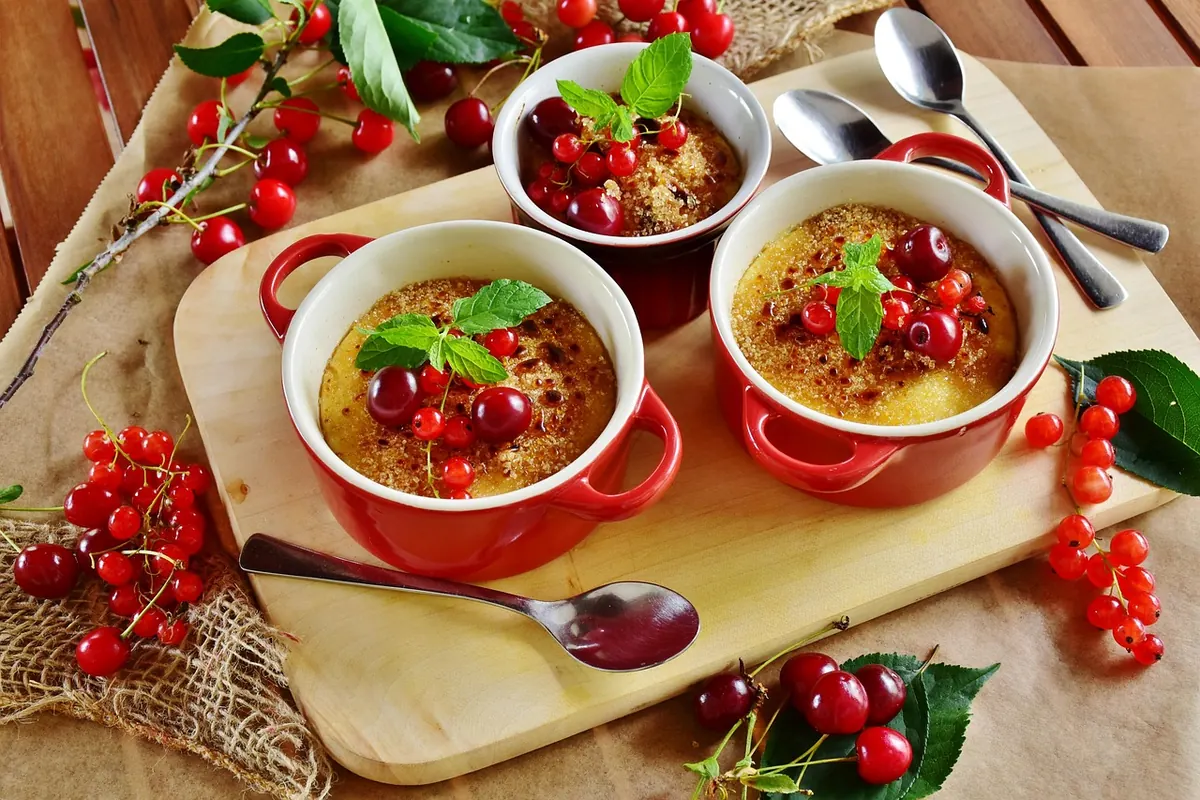
Crème brûlée asks you to solve two lighting problems on one small plate. The caramel crust is a mirror: a thin sheet of sugar that throws back whatever you point at it. The custard underneath is pale, matte and several stops dimmer. Light for the crust alone and the custard goes grey and lifeless. Light for the custard alone and the crust blows out into a white smear. The trick is not choosing between them, but arranging your light so each texture gets the kind of illumination it actually needs.
The Two Textures You're Really Lighting
Think of the crust as specular and the custard as diffuse. Specular surfaces — glass, water, polished sugar — don't show colour well on their own; they show reflections. What makes caramel look like caramel is a broad, shaped highlight sitting on top of an amber base tone that stays visible around it. If the highlight eats the whole surface, you get white sugar, not caramel.
The custard is the opposite. It's a soft, slightly translucent solid, and it reads as silky when light skims across it and rolls into a gentle shadow. Flat, even light makes it look like a block of soap. So your setup needs one controlled reflection on top and a soft gradient underneath, and those two jobs are usually handled by different pieces of gear.
A Window, One White Card, One Black Card
You don't need a studio. A window with diffused daylight — overcast, or sun softened by a sheer curtain — does most of the work. Place the ramekin so the light comes from behind and slightly to the left or right, roughly forty-five degrees behind your subject, with the camera at table height or a little above.
Then put two cards to work. A white foam board on the shadow side, about a hand's width from the ramekin, bounces light back into the custard's dark edge. A black card held above or beside the crust shapes the highlight and keeps the background from washing out. Move each one a few centimetres and watch the crust change; small adjustments do more than big ones.
Shape One Long Highlight, Not a Scatter of Hot Spots
The crust should carry a single, unbroken streak of light from rim to rim. If you see several small bright dots, your light source is too small or too far away relative to the dish. Move the dish closer to the window, or bring the diffuser nearer, and rotate the ramekin slowly until the streak runs the way you want it. Rotating the dish is almost always faster than rebuilding the light.
Let the Custard Keep Its Shadow
A little falloff across the custard is what makes it look creamy rather than chalky. Don't fill the shadow side completely. The white card should lift the darkest edge just enough to show colour — if the custard reads as one flat tone, pull the card back a few centimetres and let the gradient return.
A mirror needs something worth reflecting. If the crust looks blank and white, the problem is usually the room around it, not the light.
Angles That Work
- Table height, crust edge nearest the camera. This is the classic brûlée angle. The rim becomes a horizon line, the crust a glossy band, and the custard curves away behind it. Best with a 50mm or 85mm lens and a wide aperture.
- Thirty to forty-five degrees down. Here you show the depth of the dish and some of the crust's surface texture at the same time. This is the angle that sells the crack.
- Directly overhead. Use it for flat lays and for photographs where the crack pattern is the story. It flattens the custard, so pair it with a low, raking side light to keep some shape.
- Twenty degrees with the spoon in frame. Tilt slightly so you see the spoon handle and the custard surface together. The spoon should be the only bright vertical in the shot, so keep it brushed rather than mirror-polished.
Shoot more than one angle per setup. Changing your camera height by ten centimetres takes seconds and often reveals a highlight you didn't know was there.
Torching and Cracking in Front of the Lens
Caramelised sugar has a short life. Freshly torched, it glistens; a few minutes later it dulls and turns faintly matte. If you're photographing the crust at its best, do the torching within a minute or two of the shot, and have everything else — cards, props, focus, exposure — already set before you fire the torch.
For the crack, tap the crust near the rim with the back of a spoon rather than the centre. The edge gives you a controlled break with clean shards instead of a collapsed crater. Leave one broken piece leaning against the crust where it can catch the highlight, and shoot the moment the spoon sinks into the custard at a shallow angle so the crust stays separated from the filling in the frame.
Prepare two or three brûlées for a session. The first is for testing light and angle, the second for the shot, the third for the reveal. If you chill the custard beforehand, wipe the rim of the ramekin with a cloth so condensation doesn't smear your clean edges.
Props That Don't Fight the Crust
- A shallow white ramekin. White porcelain bounces a little light back into the custard and keeps the colour clean. Fluted sides add shadow texture; smooth sides give you a cleaner silhouette.
- One dark surface underneath. Slate, dark wood or a matte tray. It anchors the pale custard and gives the amber something to sit against.
- A textured linen napkin, kept mostly out of focus. Texture in the background suggests a table without competing with the dish.
- A spoon with a matte or brushed finish. Polished silver throws a second, brighter highlight that pulls attention off the crust.
- A few loose sugar granules and one vanilla bean or pod. Small references to what's in the dish.
- Nothing more. Berries and mint can look appealing, but a single dark note is plenty. Two or three small props total is usually the limit.
Keep props behind the light or in shadow. Anything bright placed in front of the ramekin will show up in the crust as an unwanted reflection.
Settings and a Light Touch in Post
Put the camera on a tripod so you can move cards without moving the frame. A moderate aperture — somewhere around f/4 to f/5.6 — keeps the crust edge and the near custard both sharp; if you want a softer background, open up and refocus on the crust. Focus manually on the brightest part of the caramel and the custard just below it.
Set white balance manually. Caramel is naturally warm, and auto white balance will fight it, turning the custard grey in an attempt to neutralise the plate. Expose so the crust highlight holds detail rather than clipping; if you're checking a histogram, keep the bright end from piling up against the right edge. In editing, lift the shadows under the crust gently and leave the custard smooth. Skip heavy sharpening on the custard surface — it should read as soft.
A Shoot Order That Keeps You Sane
Build the set with an empty ramekin first and get the light right before any sugar is torched. Torch one brûlée, shoot your angles while it's fresh, then crack it and shoot again. If the crust dulls, torch a second one rather than trying to revive the first. Work through the list in order, eat the evidence, and clean the plate last.
Photo: RitaE / Pixabay