

The 10-Point Pre-Shoot Checklist for Custard Tarts and Pies
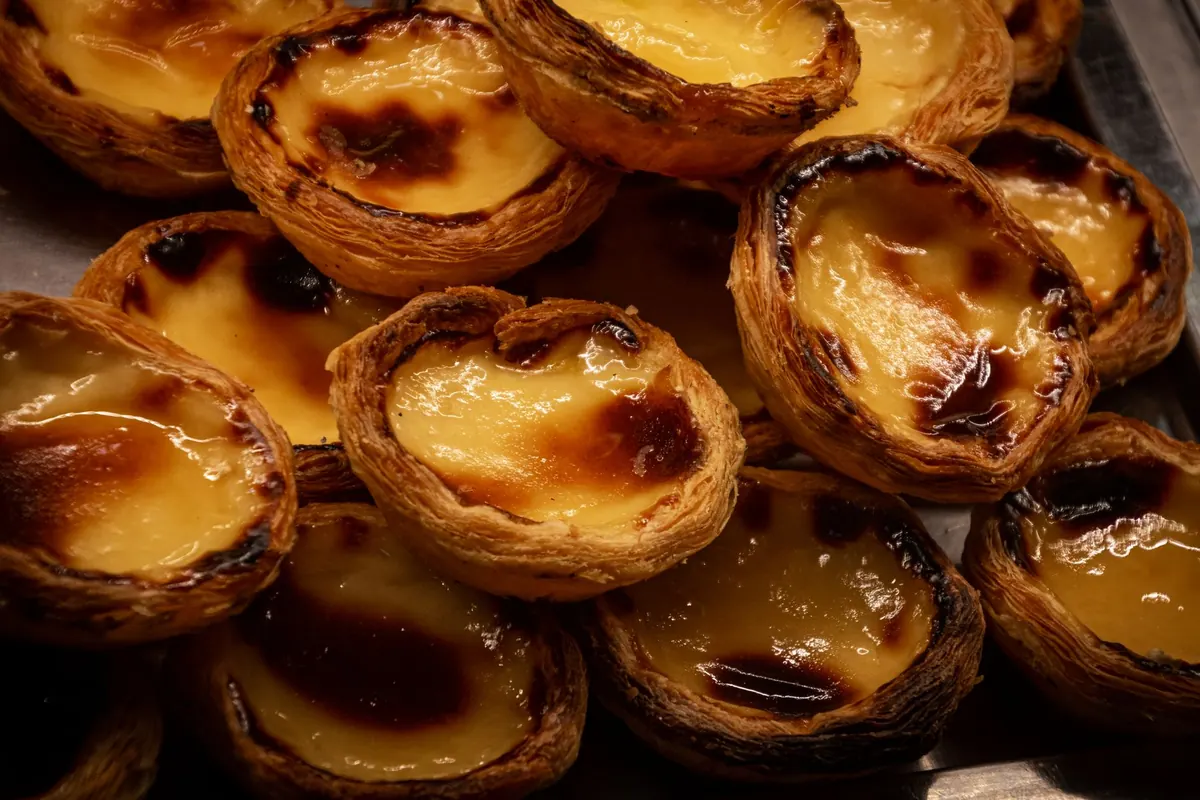
A custard tart is one of the hardest desserts to photograph well. It is pale, glossy, and wobbles the moment you nudge the plate. The pastry softens while you fiddle with a reflector, and the filling shows every fingerprint and every stray crumb. Most disappointing tart photos are not a lighting failure. They are a preparation failure. Run through these ten checks before the camera comes out, and the shoot becomes a matter of pressing the shutter.
Vet the Crust Before You Vet the Light
The crust does three jobs in a photograph: it frames the custard, it signals texture, and it anchors the colour. A greasy or half-baked base reads as raw on camera, no matter how good the filling looks.
Check the following with your eyes and your fingertips, not your instincts:
- Is the base fully baked? Lift the tart and look at the underside through the tin, or slide a thin spatula under one edge. A pale, doughy base will look underdone in the final frame, especially where shadow falls.
- Are the fluted edges dry and crisp? A soft rim slumps in the hand and looks limp on the plate.
- Is the rim evenly bronzed? A thin coat of egg wash — one egg beaten with a tablespoon of water — brushed on the rim before the final bake gives you warm, even colour that sits nicely against pale custard.
- Any leaks, burnt patches or loose crumbs? Sweep crumbs away with a dry pastry brush. Rotate the tart so any dark patch faces away from the light rather than trying to fix it later.
Make the Filling Read as Set, Not Soupy
Under-set custard is the single most common reason a tart photo looks unappetising. It appears liquid in the shell, and the tiniest tilt of the plate gives it away. Chill the tart until the centre is firm with only a slight tremor when you shake the tin. For a standard tart, that means at least four hours; overnight is safer and almost always better.
Then inspect the surface for the three usual problems:
- Weeping. Beads of water on top usually come from cooling too slowly or chilling in a humid fridge. Blot gently with a paper towel before you shoot, and give the tart ten minutes to settle.
- Bubbles. Prevent them by passing the custard through a fine sieve before baking and skimming off the foam. If they are already baked in, a light dusting of fine sugar and one careful pass with a blowtorch will even out the surface.
- Cracks. They usually mean the custard was baked too hot or cooled too fast. Small ones can be softened with a thin veil of powdered sugar; a sliced garnish or a quenelle of cream will cover the rest.
A sheen helps, but restraint matters. A very thin layer of fine sugar torched to a glassy finish looks luxurious on a plain custard tart. Too much and it reads as burnt plastic.
Style the Garnish With Intent
Garnish should explain the dessert, not decorate it. Grated nutmeg belongs on a custard tart; a sprig of mint usually does not.
Pick one hero element and commit to it: a rasp of fresh nutmeg, a curl of citrus zest, a dusting of cinnamon, a single perfect berry. Odd numbers and off-centre placement look more natural than symmetrical arrangements.
Timing is everything here. Add cream, fresh fruit and soft herbs in the final seconds before the shutter, not at the start of the shoot. Grated nutmeg dulls within minutes and cream slumps under warm lights. Keep two spares of every perishable garnish on a small plate within arm's reach, along with tweezers and a clean dry brush for last-second repairs.
Build the Background Before the Tart Lands
Set the surface, props and light first. Then bring the tart in. Working the other way around means the custard sits at room temperature while you hunt for a linen napkin.
Choose a palette that contrasts with the filling. Warm gold custard sings against slate, cool marble, charcoal, deep green or pale blue. Avoid cream and butter-yellow surfaces that merge with the tart and flatten the whole frame.
Props should tell a small, believable story: a grater with a smear of nutmeg, a fork resting on a folded napkin, a few pastry crumbs on a board. Keep the background quiet behind the point where you plan to cut. If you have one, a piece of black foam core on the shadow side will deepen the contrast and give the custard a rounder, richer look.
Lock Focus Where the Bite Will Be
Decide the plane of focus before you touch the camera. On a straight-on shot, focus on the front rim. On a 45-degree angle, focus on the leading edge of the filling, where a viewer's eye lands first.
Aperture follows the story you want to tell. Between f/4 and f/5.6 gives a single tart a soft, tactile fall-off. Between f/8 and f/11 keeps a whole table of props readable. Fluted pastry edges fool autofocus, so switch to manual and use live view magnification to check the rim. If the custard throws an ugly white highlight at you, move the light a few degrees or fit a polarising filter rather than fighting it in editing.
Finally, plan the slice shot. Chill the tart thoroughly, use a hot, dry knife and wipe the blade between cuts. Cut one clean wedge, then ease it forward with a palette knife. Photograph the cross-section at eye level to show the layers: pastry, custard, garnish. That image sells the dessert better than any overhead.
The Ten Checks, in Order
- Crust baked through, dry at the base, no soggy seam.
- Rim evenly bronzed and brushed free of loose crumbs.
- Filling fully set and properly cold, with no slosh when the tin tilts.
- Surface inspected for weeping, bubbles and cracks — fixed or styled around.
- Sheen evened out with a light torch pass or a fine dusting, not both.
- One hero garnish chosen, plus two spares on standby.
- Cream, fruit and fresh herbs held back until the final seconds.
- Surface and props chosen for contrast, placed before the tart arrives.
- Light shaped with one main source and a card for fill or shadow.
- Focus plane, angle and slice plan decided before the first frame.
Work Fast, Then Eat
Custard tarts are perishable and they do not enjoy sitting under warm lights. Keep the pie in the fridge between setups, and use a stand-in plate or an older tart while you dial in the light. Swap in the good one only for the frames that matter. If a shoot runs long, replace the tart rather than letting it sweat on set.
When you are done, wipe the knife, cut the wedge, and eat it while the pastry is still crisp. A tart that photographs well and tastes good is the whole point — and the second one is always easier than the first.
Photo: Magda Ehlers / Pexels